It's time for another DIY project! Woop woop!
It's been a while since I've blogged about a DIY and I've been slowly but surely working on this particular project, not because it takes a long time, but because I am so scattered brain that it takes me a while to finish certain tasks.. haha. So, without further ado here it is....
Ta ta daaaa!! tadatadatada ta daaaaaaa!!
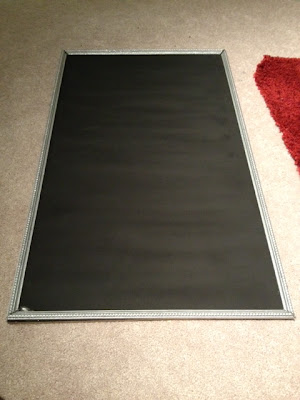
A chalkboard!
Pretty darn cute, huh? Best part? It cost lest than $20. Try buying a chalkboard for less than $20, it's just impossible. So I decided to make my own to hang in my kitchen. I've been wanting to re-do my kitchen "decor" to have more of a farmhouse feel but with a little glam, and since I rent, I can't really do much about the actual kitchen, I can only add things to make it look pretty, but I can't paint or replace the million different things I want to get rid of. Ugh.
So for my chalkboard I headed to Home Depot. After looking around for a while I found that they sell a pretty big slab of chalkboard for $10. I almost bought that and had them cut it down to the size I wanted, but I wanted something a little sturdier and I didn't know what I would do with the extra chalkboard. So I bought a piece of wood that was the perfect size (2x4) for $6. The particular wood I bought is one that is made as a base for drawers. So if you have some old drawers laying around, go ahead and pull out the sides and use that flat bottom part.
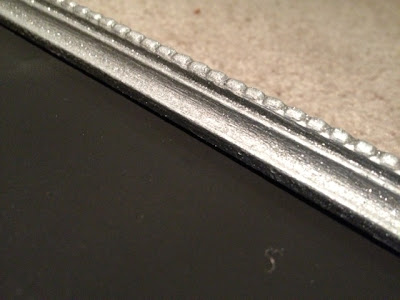
I also bought a spray can of chalkboard paint for $4 and these detailed wood borders for $2 each (I only needed 2 of them). The borders I sized and cut at Home Depot since they have the saws you can use for free at work stations in the wood section. I made sure to measure the length of the pieces I needed and cut at an angle, so when I would glue the borders to the chalkboard, the ends would fit like puzzle pieces and not overlap each other.
That process took a little bit of time, since the saws weren't perfect for cutting the border and I needed to carefully line up the edges to make sure each side would fit properly.
I also bought a can of metallic silver spray paint for $4, a bottle of Elmer's Wood Glue and some picture hanging brackets.
After I left Home Depot, I went home and cut up some old paper grocery bags to lay out as my work station on my balcony for spray painting. I then primed the wood with some primer paint I had and waited for it to dry before I began to spray paint the surface with the chalkboard paint. I probably did about 3 full coats of chalkboard paint just to ensure everything was covered. I carefully moved the chalkboard aside and laid out new paper bags for the border. I didn't want the fresh chalkboard paint on the bags to get on the border. I spray painted the borders with the metallic paint, no need to prime these, and waited for that paint to dry as well.
I waited at least 24hrs for the spray paint to dry before I added a coat of Martha Stewart's glitter paint to the borders to give it a more glam look. After a few hours of drying, I went ahead and lined up the border on the chalkboard and began to glue it using Elmer's Wood Glue. I waited few hours for that to dry just to make sure everything was secured and began to measure the chalkboard to see where I would install the picture frame brackets.
The brackets were pretty straight forward to install. I just measured and screwed in the screws. I measured the board so that each side was at an equal distance from the center of the board, that way it hangs and holds firm and steady.
I haven't officially hung my chalkboard yet because I am having some repairs done in the kitchen. But I can't wait until the kitchen is ready so I can make full use of it and do some meal planning!
Do you have a chalkboard? If so, what do you use it for?


