Tuesday, December 4, 2012

Strawberry Rice Pudding

Hey oh!

A while back I made this delicious rice pudding recipe from one of my favorite cookbooks, La Tartine Gourmande and now that I have been tweaking my blog a bit, I realize I never posted the recipe! Well, here is the delicious and easy to make strawberry rice pudding recipe. It's a dessert that is the perfect combination of sweet and tart. I'm not usually a fan of rice pudding, but this is one I will be making (and eating) again. 

My boyfriend also seemed to enjoy it, although he sampled it a couple of days after I made it. This is really something you should eat the same day, especially after it is made, as it is still nice and warm. But if you must save it, a couple of days didn't alter the taste too much. 


Ingredients: (serves 4)
  • 6 tablespoons risotto rice, Carnaroli or Arborio
  • 2 full cups whole milk, (or half soy milk, half unsweetened coconut milk)
  • 10 green cardamom pods (I used cardamom powder and used less than the amount of 10 pods)
  • 10.5 oz strawberries, hulled
  • 1 tablespoon lime juice (optional)
  • 1/2 cup blond cane sugar + 2 tablespoons
  • 1/8 cup water
  • Grated coconut (optional)
Directions:
  • In a small pot, dissolve 1/2 cup sugar with the water and bring to a gentle boil.
  • Wash and dice half of the strawberries. Add them to the syrup with four cardamom pods and the lime juice. Simmer on low heat for about fifteen minutes. Let cool and remove the cardamom pods.
  • In the meantime, rinse the rice under cold water.
  • Bring the milk to a first boil with 6 cardamom pods and then slowly pour the rice in. Reduce the heat, cover and simmer for 30 minutes, or until the rice is cooked but stays al dente. Remove the cardamom pods and mix in the rest of the sugar. Let slightly cool in a bowl.
  • When the cooked strawberries are cooked, mix them with the rice (or serve the rice and top with the cooked strawberries.)
  • Add the remainder fresh strawberries, sliced. Serve with grated coconut if you like.
I couldn't find cute little jars to serve my rice pudding in, so i bought some microwave safe Gerber baby food jars. I discarded the contents, washed and removed the labels, and used them as containers. They are only about $.89 each, so it was a pretty affordable alternative! I will admit that I bought the applesauce flavor thinking I could eat the contents and use the jars, but that applesauce didn't taste like the applesauce I was imagining... I'll remember that for when I have kids. Until then, I'll stick to some rice pudding and perhaps some REAL applesauce =)


Monday, December 3, 2012

A Weekend Stew

Hi all,

This weekend I was feeling a little off and needed some TLC so i prepared a delicious beef stew for my love and I. He usually cooks us a lovely meal but I wanted to make something for us since he's been having long weeks at work. This stew is really easy to make and very healthy too. Best part is you will have plenty of left overs! Perfect meal to end a long week and to warm you up on cold winter days <3
Recipe courtesy of the book Homemade

Ingredients:
  • 2 tablespoons of olive oil
  • 1 onion thinly sliced
  • 2 garlic cloves, crushed
  • 1 red bell pepper, seeded and thinly sliced
  • 3lbs of stew meat (I buy a pre-packaged and pre-cut stew meat available at Trader Joe's or Whole Foods)
  • 1 tablespoon of all purpose flour
  • sea salt and freshly ground pepper
  • 2 1/4 cups of button mushrooms, sliced
  • 3/4 cups + 2 tbsp of red wine
  • 1 28 oz can of chopped tomatoes
  • 2 teaspoons of finely chopped rosemary
Directions:
  1. Preheat oven to 350 F.
  2. Place a dutch oven (cast iron casserole such as Le Creuset. I have one from Sur La Table) over medium heat and add the olive oil, onion, garlic and red bell pepper. Cover and cook for 2-3 minutes or until tender.
  3. Toss the chunks of beef in the flour, making sure they are thoroughly coated.
  4. Remove the lid from the dutch oven, add the beef and season with salt and pepper. Cook until all sides of beef are brown.
  5. Add the sliced mushrooms and let cook for an additional minute or 2.
  6. Pour in the red wine and let simmer for 10 minutes. (I usually use a merlot)
  7. Stir in the tomatoes and rosemary
  8. Cook in the oven for 1 1/2 hours. (make sure you wear oven mittens when handling the casserole after it cooks in the oven, it will be very hot and you will burn yourself otherwise).
Serve and enjoy! I served the stew with some sliced Italian bread for dipping in the broth as well as a side arugula salad and some sparkling water. I feel like sparkling water makes the meals feel more like a date night =)

Thursday, November 29, 2012

Holiday Wreath

Hi everyone!

Wow! It has been a really long time since i've made a post. Life has been a bit hectic, but I am hoping to get back into blogging now that I have some free time =).

How to make your own holiday wreath for under $20. What you'll need:
  1. A plain wreath. I got mine for $8 at target. You can also recycle an old one by carefully removing the decorations, but I think the one at Target was the best choice.
  2. Hot glue gun. You can find some small inexpensive ones at places like JoAnn's Fabrics or Michael's.
  3. Pine cones, flowers, berries, ribbon, bells, anything you want to decorate your wreath with. I found some glitter pine cones with berries for decorating Christmas trees at Target. They were only $3 each, and I bought 2 of those. I also bought a box of red berries and a pair of glittery doves for $2. I got the bell at Pier 1 for $1.
  4. Scissors and twine.
Directions:
  • Take a look at the materials you bought and think about how you want to place them on your wreath. Scissors come in handy for cutting pieces to fit your wreath and for changing the functionality of those pieces too. The pine cones and berries I bought were attached to this plastic branch originally intended to be placed on a tree, but I cut the pieces I wanted to use off and discarded the rest. 
  • Once I had the lay out of the pieces picked out, I started hot gluing each piece onto the wreath. Make sure you have a popsicle stick or something you can use to press some of the pieces to the wreath since the glue will be hot. 
  • I cut off the string that was attached to the dove (it was originally a tree ornament) and hot glued it to the wreath. I left this for last, because I wanted the dove to stand out and not be obstructed by some of the berries or pine cones.
  • Lastly, tied the bell to the wreath with some twine. I also used cut off a big piece of twine to attach the wreath to my door since I don't have a special wreath hanger. I just wrapped the twine around a top section of the wreath a couple of times and then tied that to my door and double knotted it. The wreath isn't very heavy, so the twine has been working just fine! And once the Holidays are over, I can simply cut the twine to remove the wreath.
Here is a before and after look:
Before

After

I was totally excited by and in love with my wreath! It makes the entrance to my little apartment look so cheery =)

Monday, July 30, 2012

I Left My Heart in San Francisco

As you've noticed, I have been MIA the last couple of weeks.. and it is because i was just in San Francisco for my boyfriend's sister's wedding. It was absolutely beautiful and i had an incredible time there! We were there for a week helping out with last minute wedding details, attending the bridal shower, rehearsal dinner and then the big event! Here are a couple of pictures from my trip. Once I am done unpacking and settling in to my routine, i'll update the blog with some new recipes =)

The bride's bouquet! Isn't it beautiful!? It had a few succulents mixed in with some roses and other beautiful flowers.

Weenie puppy themed bridal shower! The Maid of Honor (and younger sister) made these delicious chocolate cupcakes with peanut butter cup centers for the bridal shower. 

It was absolutely beautiful! the weather was great all week, i felt really lucky!

I was very excited to see this! especially since we got to drive down the street! 


Wednesday, July 11, 2012

Sherbet Me Crazy

It's been a busy last couple of days for me, so i haven't had a chance to write any posts =(. I have been working on a lot (bringing home the bacon!) but i wanted to share a quick and easy recipe with you!

The record breaking heat has been unbearable! So here is a little something to help you cool off! I don't think i can share enough tips and recipes on cooling off this summer. Is it just me, or is this the hottest summer we've had in years!?

I tried this recipe from Barbara Bakes. It was quick, easy and very refreshing for the 106 degree weather we've been having! (the recipe and pictures are from the Barbara Bakes website)

Ingredients:

  • 4 cups sliced strawberries
  • 3/4 cup (6 oz.) strawberry yogurt
  • Juice of 1 lime
  • 2 tablespoons agave (more or less depending on the sweetness of your berries)
For the yogurt, i used Wallaby's low fat organic strawberry flavored yogurt. It is so creamy and flavorful. You can find it for $.99 at whole foods, a bit pricier than most, but it's totally worth it. They also have a greek yogurt for $1.99. I don't usually like greek yogurt, but Wallaby's greek yogurt I am a huge fan of. It comes with a little side pocket with toppings like cherries, honey or strawberry that you pour into the yogurt and mix. It is delicious! I knew Wallaby wouldn't let me down!
Directions:

  1. Place all of the ingredients (except the agave) into the blender and blend until smooth.
  2. Taste the mixture to determine the amount of sweetener needed and sweeten to taste.
  3. Pour the mixture into your ice cream maker and churn according to manufacturers directions.
  4. Once the ice cream maker has finished its cycle pour the sorbet into a container and freeze. You may want to take it out of the freezer and mix it quickly every 30 minutes for 2 hours to keep the consistency even.
  5. If you do not have an ice cream maker, pour the sorbet mixture from the blender into a freezer safe container (preferrably a shallow container to expedite freezing) and take it out of the freezer to mix it every half hour until the desired consistency is achieved.
  6. Remove from the freezer 20 minutes prior to serving to soften slightly.


Friday, June 29, 2012

Let's Cool Off!

Wow! summer is definitely here with a vengeance today! It is 104 degrees in my city today with a heat index of 111! Yikes! My poor plants are dying from all this excessive heat =( and so am I.. and my kitty cats. I think today is a great day (and this whole weekend probably) to post some refreshing drink recipes and snacks.

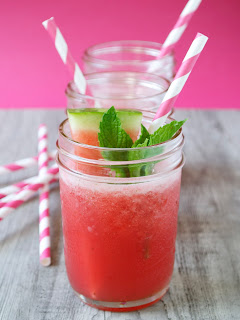
I'll start off with a drink, because it is friday ::cue annoying Rebecca Black song:: and who doesn't enjoy a good happy hour on a friday!? I got the main recipe from Mama's Gotta Bake and tweaked it a little bit ;) I am using her picture of the drink because I and my partner in crime for today were very impatient and drank it all before we realized we needed to take some pics.


Ingredients: 
  • 4-5 cups of seedless watermelon (1 medium-sized watermelon), cut into chunks
  • 1/2 peeled cucumber, cut into chunks
  • 5 -10 mint leaves roughly chopped
  • 1 tablespoon of fresh lime juice
  • a pinch of salt
  • A cup of sparkling lemonade or champagne (I used sparkling lemonade from Trader Joe's)
Directions:
  1. Depending on the size of your blender, you may have to do this in two batches, I did. Divide your ingredients in half, and process it twice if need be. Place all the ingredients in a blender, and process until it smooth. Pour the mixture through a strainer into a bowl, pressing the solids with a wooden spoon to get all the liquid out. (I didn't pour the mixture through a strainer because I like the texture of pulp in my drinks)
  2. Place the watermelon mixture back in your blender and add ice cubes. Be careful of how much ice you put in, as it will water down the sparkling drink you choose. I used just enough ice to make it slushy but still pack some punch. Serve immediately. 
* Depending on how you like your drinks, you will have to adjust how much watermelon/champagne/ice you use. Sometimes when i follow the recipe, my drinks come out slightly different. So I encourage you to use your best judgement on how much of each ingredient you want to use. I found that the less watermelon and ice i used, the less watery the drink turned out. 
If you use sparkling lemonade, don't add any more sugar. The lemonade will have enough sugar in it to sweeten the cooler just right =)

Thank you Mama's Gotta Bake for a great recipe (and pictures)!!


Monday, June 25, 2012

Pizza Night

One of my favorite things to do with my BF and his roommate is have a pizza night! My BF is a pro at making this delicious BBQ chicken pizza with a side salad, smoothie and sometimes his own homemade ice cream (i am a very lucky girl to have a guy who likes to cook!). He likes to make his own dough, says the store bought stuff doesn't taste the same, but i like the store bough dough just as much as his dough! And it saves me extra time when i try to recreate his recipe on my own.

This is a very easy recipe to make and a great group activity for when you have friends or other couples over. It's also great with a beer or cider on the side, and perfect for football season too!

Ingredients
For Pizza
1 lbs boneless chicken breast
cilantro
1 red onion
1 bag of shredded cheese of your choice (we use cheddar and mozzarella)
1 store bought ball of dough (you can find this at Trader Joe's or Whole Foods for under $3)
1 bottle of Stubb's original BBQ sauce
1 bottle of Stubb's spicy BBQ sauce
salt and pepper (or other chicken seasoning you like)
a little bit of semolina flour

For Smoothie
1 cup of frozen strawberries
1 banana
1/2 cup of blackberries
1/2 cup of blueberries
1 cup almond milk
1 tsp of raw blue agave syrup
some ice cubes

Instructions
For the Pizza
Preheat the oven to 425 with a pizza stone inside. If you don't have a pizza stone, that's ok, you can use a baking sheet but leave the baking sheet out while the oven preheats. Chop up the chicken into small pieces and place on a pan drizzled with a little bit of canola oil. Season the chicken with salt and pepper and cook until the meat is no longer pink. I like to let the chicken cook until it is seared and you can see some crispy pieces. Set the chicken aside, chop up the red onion into small pieces and set aside.

Take a little bit of semolina flour and sprinkle it over a clean cutting board or counter space where you can roll out the pizza dough. Begin to roll out the dough until it is large enough to cover the size of the pan you will be using to bake the pizza. Try to make the distribution of the dough as even as possible, so that you don't end up with one extra doughy side and one extra crispy side.

Take the two bottles of Stubb's BBQ sauce and pour 1/2 cup of the original and 1/2 cup of the spicy in a bowl and mix. Take the mixture and begin to spread over the pizza dough until it is evenly covered with sauce. You can use more or less sauce depending on how big your pizza is and how much sauce you like. Follow this step with the chicken, sprinkle the chicken evenly on the pizza dough, followed by the red onion and finally the cheese. Place the pizza in the oven and let bake until crust is crispy and brown, about 25min. Take the pizza out, let cool, chop up some fresh cilantro and sprinkle on top of the pizza. Cut pieces with a pizza cutter and serve.

For the Smoothie
Place all the fruit and almond milk in a blender, add some ice and blend until smooth. You can add more ice depending on how frozen you'd like your smoothie to be. If you like something a little sweeter, add a tsp of the agave syrup to sweeten it up and blend. You can add more syrup as you blend. Pour smoothie in a glass and enjoy!

This was a delicious dinner and the pizza is great for left overs too! As you can see i couldn't wait to have a bite before taking a picture haha. You can make variations of this pizza by substituting or adding ingredients. We sometimes add fresh peppers from my garden and mushrooms.

Tuesday, June 19, 2012

Thank You, Cake Stands

Hi everyone!

I recently went on a little etsy shopping spree and i wanted to write a post about my experience. Etsy is a great website for those of us looking for unique handmade pieces as well as something a little vintage.  I've been looking for all kinds of things such as thank you notes, cake stands and vintage tablecloths/napkins. There are many great stores to choose from with countless of cute and at times affordable collections of goodies. I had a hard time deciding what i wanted to get but eventually settled on this super cute set of handmade thank you notes and vintage handkerchiefs from Donda Lee's. Best of all, they came wrapped in this super cute paper with little hand written notes from the seller. I was so excited to get these just because of the packaging alone haha.

My thank you notes and handkerchiefs!

Once i opened one of the packages, the handkerchiefs inside were wrapped in pink tissue paper!

The thank you cards came with some cute gift tags and a little deer! 
(I'm sorry the picture quality is not great, i need to figure out how my camera works!)

A much better picture of the cards from Donda Lee's etsy store.

I also got a cute cake stand from The Cottage Market. I fell in love with the cake stand when i saw it and knew i had to have it. The stand came in the mail the same day as my thank you notes, so i was very excited to unwrap the stand as well! 

This is the super cute handmade cake stand with one of the handkerchiefs i bought from Donda lee's. 

The best part about getting the cake stand i ordered from The Cottage Market? The surprise free gift! Another cake stand! 

Needless to say, everything was as adorable as i expected. I did expect the cake stands to be a little bit bigger, they are only big enough for one cupcake :( I was a bit disappointed with the size, but these are very cute and will be great for photo ops of future recipes i try =). Both stores had very nice owners who were very friendly and easy to communicate with. They also provided reasonable shipping and adequately packaged the items so that they would not brake. I know I will be purchasing more items from their stores in the future! Give their stores a look-see, I know you will fall in love with their items as much as I did! 


Monday, June 18, 2012

A Little Farmer's Market

Hey all!

This weekend was absolutely gorgeous! It was sunny, warm, and a little breezy.. perfect weather for hanging out outdoors and enjoying the best summer has to offer. This weekend was very busy for me, I tried out a new lemon and honey chicken recipe, went clothes shopping for the man friend, went out to brunch with friends, but most importantly, I went to the farmer's market.

Farmer's markets hold a special place in my heart. Ever since my college days in Madison, WI, I have been obsessed with going to every market I can find. Unfortunately for me, Madison has been hard to top. There's nothing like going to a market that encircles a beautiful state capitol with its many vendors. From delicious cheese breads to cheese curds and jams. There was a little bit of everything for everyone, all a few steps away from a beautiful lake and outdoor terrace where you could enjoy some Wisconsin beer (spotted cow, anyone?) or fresh made ice cream! The best time of the year in Madison was definitely the summer, and my summers in Madison were unforgettable.

Still, i have managed to find a very small but quality farmer's market in my current city and i took a picture of my favorite bakery stand. This place makes every type of bread, muffin and cookies imaginable and sometimes they give you great deals if you buy a lot (i often score some free and delicious almond cookies!)

I left the market this weekend with a bag full of  chocolate milk, yogurt, breads, almond cookies, quiche  and prosciutto! So delicious! I love weekends spent buying local foods and eating them outdoors! For some reason, food bought at farmer's market always tastes a million times better than if i had bought them at the grocery store. I think someday I will expand my balcony garden into a huge farm and make my own milk, cheese and ice cream... I'll prob need to invest in a quality fitness trainer too.. hahaha. 

Thursday, June 14, 2012

Spicy Spaghetti

Hi Everyone!

In the last post i mentioned a recipe i tried from La Tartine Gourmande. Well, here it is! I hope you enjoy it as much as i did!

Ingredients:

4 large ripe tomatoes
sea salt and pepper
4 tbs olive oil
1 medium red onion, thinly sliced
4 garlic cloves, finely chopped
zest and juice of 1 large lime
3 lemon thyme twigs (it is important that you use twigs and not just the leaves)
1 small habanero pepper, seeds removed and diced
**this made the dish a bit too spicy, i recommend half a habanero if you have a sensitive palette.
2 tsp light muscavo sugar (brown sugar worked just as well)
1 bay leaf
12 oz spaghetti
4 packed cups of arugula (you can substitute this with spinach)
2 tbs roughly chopped basil
parmesan cheese to top

Directions:

Blanch the tomatoes in salted boiling water for 1 min. Wait, what? what is blanching? I had to google this and it is basically leaving the tomatoes in boiling water long enough to soften and peel the skin off. Don't leave it in longer than 1min though, it will make chopping the tomato tougher.. and a mess. After 1min, rinse them under cold water, peel, core and slice.

In a wok (i used a pan), heat 2 tbs of olive oil over medium heat. Add onion, garlic, lime zest, lemon thyme, and chile and cook for 3-4 minutes. Add tomatoes, sugar, and bay leaf and season with sea salt and pepper. Reduce heat to medium-low and cook for 15min, stirring occasionally until the tomatoes have soften.

In the meantime, cook the spaghetti as usual and later transfer to a bowl and add the remaining 2 tbs of olive oil.

Add the pasta and arugula to the wok. Remove from heat and toss until the arugula is wilted from the heat of the spaghetti (if you use spinach, add the spinach BEFORE you add the pasta and allow to cook with the sauce for a couple of minutes and then remove from heat and add the pasta). Discard the bay leaf and lemon thyme twigs and add lime juice and basil.

Serve in a bowl and top with parmesan cheese. Season with salt and pepper if necessary.

This recipe was delicious! A very light, summery sauce perfect with a glass of sparkling lemonade! You can also top with some prosciutto or other meat if you'd like. I added pan seared tilapia to mine the next day when i ate the left overs.


Wednesday, June 13, 2012

A Weekend and a Cookbook

This past weekend my boyfriend went out of town for his high school reunion (we are getting so old!) and i didn't know what i would do with a whole weekend to myself (don't judge me, i'm usually very independent haha). So with all of this free time i took on various project. I de-cluttered my den, cleaned out my closet, repainted my coffee table, tried out a new recipe and did some gardening. This was my ideal weekend. Except that by the end of it i felt like i was 37 rather than 27 haha, what is going on!!? My life has gone from late nights out on the town to late nights in organizing and cooking. It's a sign.

And I don't know if it's a good one yet..

Although this blog is pretty new and simple, i've enjoyed reading other people's blogs for a few years now. One of my favorite blogs is La Tartine Gourmande, a very cute, homey blog by a very talented French woman named Beatrice and her adorable little daughter (and taste tester) Lulu. Her blog is not only beautiful but very popular, and she recently published her very first cookbook. I have loved her blog for so long that the minute that book was for sale I was on Amazon buying it. I don't regret my purchase one bit, and here's why:

Her recipes are healthy and delicious.  And she adds personal stories of her life and growing up in France to tie each recipe with a memory. It is a little bit of everything in the most beautiful cookbook i have ever seen. The pictures are absolutely breathtaking, really.


Most of all, i love this cookbook because it has exposed me to using ingredients i have never heard of (cardamom pods anyone?!) and thus, new recipes i could have never imagined. I've found it to be easy to read and use, and although some of the ingredients are unknown to me, a quick google search quickly explains what they are (and sometimes offer their substitute). This book has been a great tool in helping me expand not just my palette, but also my cooking skills. I am sure my boyfriend is happy to be eating meals such as spicy spaghetti and tartlets instead of my oven burnt breaded fish and twix ice cream bars, haha.

This past weekend i tried out the spicy spaghetti recipe and i've been eating it for lunch and dinner for the last 3 days. Sad to say (sort of), today was my last day. This is one of the best pasta dishes i have tried from a cookbook, hands down. And so i promise to post the delicious recipe with pictures of my dish soon.. right now i have a very active kitty cat keeping me from writing this blog.

And there goes the paper towel roll.. ugh.

to be continued..


Monday, June 11, 2012

A Little Comfort

I have been going on a cooking binge lately (i have some spare time these days) and one of my favorite dishes i've made is Sloppy Joes. These aren't your avg. Joes (the kind i once attempted to make in college but tasted more like hamburger helper gone bad) these. are. AMAZING! And as it turns out, they are very versatile. You can use the meat for stuffing empanadas, tacos, or pasta sauce. And the longer this sits in your fridge, the better it tastes! Four straight meals of sloppy joes and i was still wishing i had made more. Here is the recipe (William-Sonoma Comfort Foods cookbook), with a few modifications:


Ingredients:


  • 1 Tbs. canola oil
  • 1 yellow onion, diced
  • 1 celery stalk, diced
  • 1/4 cup finely diced green (i used red) bell pepper
  • 1 1/2 lb. ground beef (i use 85% lean ground beef, grass fed when possible)
  • 1 cup tomato sauce
  • 1/2 cup ketchup-style chili sauce (i used 1/2 cup of ketchup and 1 tbs of chili powder)
  • 1 Tbs. Worcestershire sauce
  • 1 Tbs. Dijon mustard
  • 1 Tbs. cider vinegar
  • 1 Tbs. firmly packed light brown sugar
  • 1 tsp. kosher salt (i used sea salt from Trader Joes)
  • 1/4 tsp. freshly ground pepper (regular pepper will work fine)
  • 6 sesame-seed sandwich buns, split

Directions:

In a large fry pan over medium heat, warm the oil. Add the onion, celery and bell pepper and cook, stirring occasionally, until the onion softens, about 5 minutes. Add the beef, increase the heat to medium-high and cook, stirring and breaking up the beef with a wooden spoon, until it is no longer pink, about 10 minutes. Stir in 1/4 cup water (i didn't add water), the tomato sauce, chili sauce, Worcestershire sauce, mustard, vinegar, sugar, salt and pepper and bring to a simmer. Reduce the heat to medium-low and simmer, stirring frequently, for about 20 minutes to blend the flavors. 
**for the directions, i chose to cook my joes in a cast iron casserole. I wanted to slow cook the meat for more flavor. I let the meat cook in low heat for about 1 1/2 hrs. 

Toast the buns. Place the bottom halves of the buns, cut side up, on warmed individual plates and top with the beef mixture, dividing it equally. Cover with the bun tops and serve immediately. Makes 6 sandwiches.

Variation: As you can see from the pictures, i also added a can of black beans. I drained them and pour them in along with the tomato sauce. They weren't overcooked and it added a nice texture to the sauce.
Needless to say, my boyfriend loved these! We ate them with an arugula and avocado salad with a balsamic vinaigrette dressing and sparkling lemonade from Trader Joe's. Perfect meal to get us thru the rest of the work week. And these make a great bag lunch too! Just store the toasted buns in a zip lock bag and the meat in a tupperware container and put together when you are ready to eat. 

Sunday, June 10, 2012

Summer is Here!

Summer is finally here! My favorite season of the year! This year I am really excited for this season because I have a sweet little balcony garden to take care of. The most exciting part about that is the fresh herbs and vegetables I can grow and consume throughout the season. Here is a picture of my garden when I first planted it this season. You will see some rosemary, basil, oregano, mint, lemon thyme and parsley.


My garden has been growing like crazy! And it has been hard to keep up with the trimmings, especially when I am a single gal and aren't feeding a family of 4... although my boyfriend sometimes eats like one. I haven't found a great way to preserve fresh cut herbs but the other day (while trying to figure out what to do with empty milk jugs) I came up with the idea of putting the fresh cut parsley and basil in the jugs filled with water. Voila!


They've been holding up for the past few days in this jug. I've been changing the water every other day so that it stays fresh. It's a neat idea for empty milk jugs. I usually return these to the store to be recycled, but now i may just keep one or 2 for this purpose =). It's a cute way to preserve your herbs plus it makes your whole kitchen smell great! Try it out and post a pic!